
Word’s table commands are impressive, but for serious table work you need to use Excel. And when you can’t make up your mind, you just shove an Excel worksheet into Word. Believe it or not, but this procedure is legal everywhere but North Korea.
First some clarification:
Spreadsheet is the traditional term for the type of documents Excel creates. In fact, Excel is a spreadsheet program.
Worksheet is the name of a specific spreadsheet document.
Despite this confusion, I use both terms interchangeably.
You’ll find two ways to plop an Excel worksheet into a Word document: Copy and Insert. Of the two, Copy is the most logical and simplest to explain:
- Create the worksheet in Excel.
- Select and copy the portion of the worksheet you want to use in Word.
- Open or create the Word document.
- Paste in the Excel worksheet.
Figure 1 illustrates the table I created in Excel, which is selected. I’ve also pressed Ctrl+C to copy that chunk-o-cells.
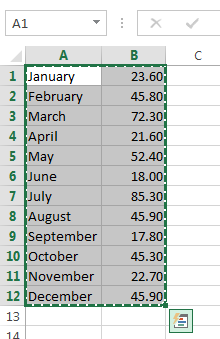
Figure 1. A chunk of an Excel worksheet is selected and copied.
In Figure 2 you see that same table pasted into Word.

Figure 2. The worksheet chunk is pasted into Word as a table.
Properly using the Paste Options palette (Figure 2) is important: The item shown in Figure 2 (Link & Use Destination Styles) is one of the Link options. By linking the worksheet, any changes in Excel are reflected in the Word document. You can, however, opt to paste in plain text. Table 1 lists the Paste Option icons and what they do.
| Icon | Description |
|---|---|
 |
Keep Source Formatting (K): Paste in the table using the format from the Excel worksheet. |
 |
Use Destination Styles (S), Paste in the table using the format from the Word document. |
 |
Link & Keep Source Formatting (F), Paste in the table using the Excel worksheet formatting and link to the original so that changes are shared between Excel and Word. |
 |
Link & Use Destination Styles (L), Paste in the table using Word’s own formatting, and link to the original. |
 |
Picture (P), Paste in the table as a graphical element. |
 |
Keep Text Only (T), Paste in the table as plain text, no linking or formatting. |
Bottom line: Your pasting choice is whether to use Excel or Word’s format and whether or not to link the table. The icons in Table 1 list four combinations for styles and linking.
If you choose to link, then you must manually update the table in Word to reflect any changes done in Excel: Right-click the table in Word and choose the Update Link command to update.
The final two options, Picture and Keep Text Only, don’t bother with any hot-linking or formatting, although the Picture option uses whatever format was present in Excel.
Beyond pasting in a copied chunk of an Excel spreadsheet, you can also insert an Excel object into a Word document. I may cover how that technique works in a future blog post, but I really recommend using the Copy/Paste-Link method as the best approach.
