
I see a lot of documents where the watermark feature is used. Mostly it displays the text “Draft” diagonally on the background of every page. That trick’s pretty easy to figure out, but it’s not the limit of what you can do with Word’s watermark feature.
Before getting wet, know what a watermark is traditionally an image placed on a sheet of paper itself. Large, imposing corporations often buy stationery with a preset watermark; hold the paper up to a light source to see it. Some brands of fancy paper feature watermarks. And then there’s Word, which adds the watermark as a graphical element.
Most commonly, you see a Word watermakr as the text Draft across the back of a page. An example is shown in Figure 1.
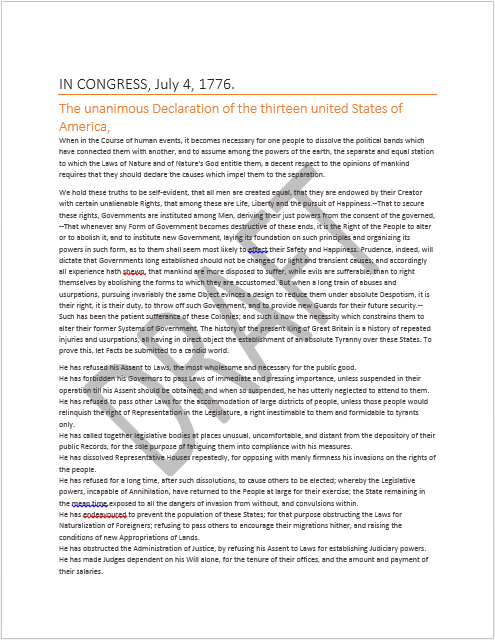
Figure 1. A sample watermark.
Here’s how you accomplish that task:
1. In Word 2013, click the Design tab; in Words 2010 and 2007, click the Page Layout tab.
2. Click the Watermark button to display its menu.
3. Choose one of the preset watermarks from the scrolling list, shown in Figure 2.

Figure 2. The typical Watermark command menu. (Word 2013 version shown.)
The watermark is applied to every page in the document — unless:
A. Your document is divided into sections, in which case the watermark appears only in the current section. Or:
B. You’ve assigned a title page to the document. In that case, the watermark doesn’t show up on the title page.
In either case, you can apply the watermark elsewhere in your document, but you need to specifically go to the section or first page and set it.
And, conversely, if you want to have a page without a watermark, choose the Remove Watermark command, found at the bottom of the Watermark menu (Figure 2).
The true power of the watermark lies in its customization. The preset options are nice, but the command is far more flexible than what you see presented. The key is to choose the Custom Watermark command (again, see Figure 2). The dialog box that appears, Printed Watermark, is shown in Figure 3.
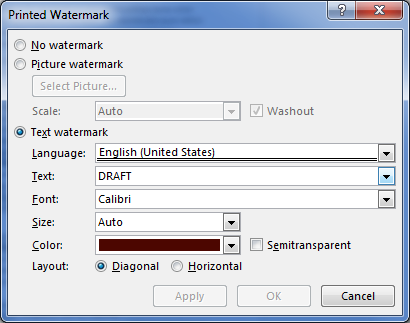
Figure 3. The Printed Watermark dialog box.
Use the Text Watermark settings to create your own watermark. Type your own text in the Text box, or choose any preset text from the menu. You can set font, size, color, and whether the layout is horizontal or angled.
The Picture Watermark area is used to apply an image as a watermark. The image shows up centered on the page background. As with the text watermark, you can set the image’s transparency so that it doesn’t overwhelm your text. Unless you’re a poor writer, in which case having an image overwhelming the text would be a super idea.
One more thing: The Printed Watermark dialog box features an Apply button. Use that button to preview how the watermark looks in your document. (Move the dialog box around to see more of the document.) That way you can experiment in the dialog box without having to commit to a design and then redo everything later.
