
If you’re the only one working on a document, great. You know what you’ve changed, and you’ve probably changed it because you want it that way. But in the world of collaboration, revision marks become necessary. That’s when things can get ugly, not only emotionally but visually as well.
The Revision Marks feature in Word really helps you sort out who wrote what. In Figure 1, you see a regular paragraph of text. (Click the figure to see a full-size version.)
Figure 1. Brilliant, unassailable text is written.
To apply revision marks, click the Review tab, Track Changes → Track Changes. Or, better, use the Track Changes shortcut on the Status bar. If you don’t see it there, right-click on the Status Bar and choose the Track Changes command. That way you can instantly see whether the feature is on or off, and you can even click that item to turn revision marks on or off.
With revision marks on (changes are being tracked), modifications to the text appear on the screen. Underlines indicate added text, strikethrough indicates removed text. The colors tell you which editor has changed things. For some documents with way too many collaborators, lots of colors show up.
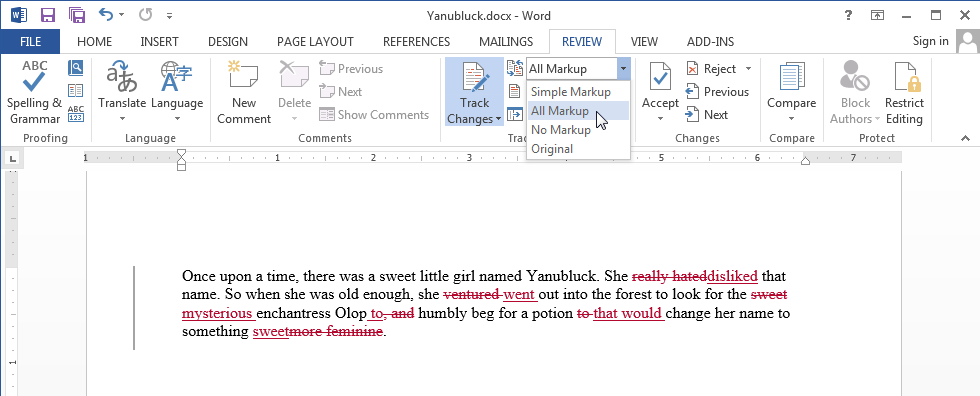
Figure 2. Revision marks in all their glory.
In Figure 2, I’ve changed text shown in Figure 1 so you can see how revision marks look. The All Markup item is chosen from the Display For Review menu on the Review tab, That command displays the details of what’s changed and what’s not. (All Markup is available in Word 2013; for earlier versions choose Final Showing Markup.)
If you choose not to view revisions, select the Simple Markup item from the Display For Review menu. (Choose the Final option in earlier versions of Word.) Simple Markup is shown in Figure 3.
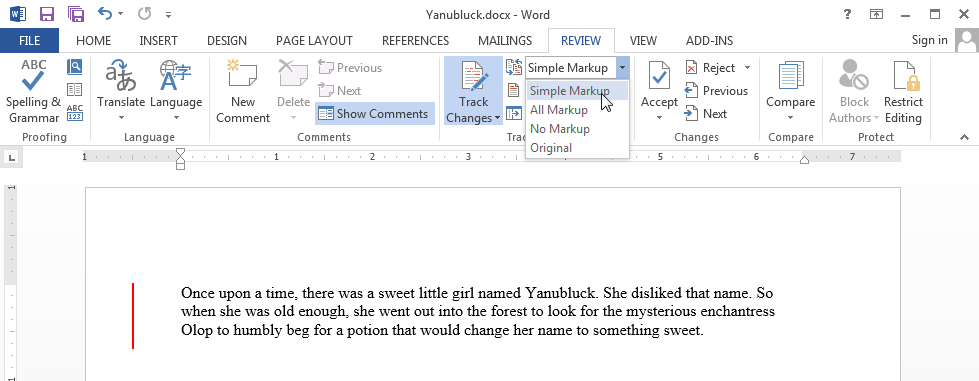
Figure 3. The Simple Markup setting shows a vertical bar, indicating where text has been changed.
In Simple Markup, you see only a red line on the left side of the screen. That’s your clue that the text to the right has been modified. The line shows up whether the text has been modified or the format changed.
Comments in the text appear in the Comment pane on the right side of the document, shown in Figure 4. To insert a comment, click the mouse in the relevant text, or select a block, and then click the New Comment button.
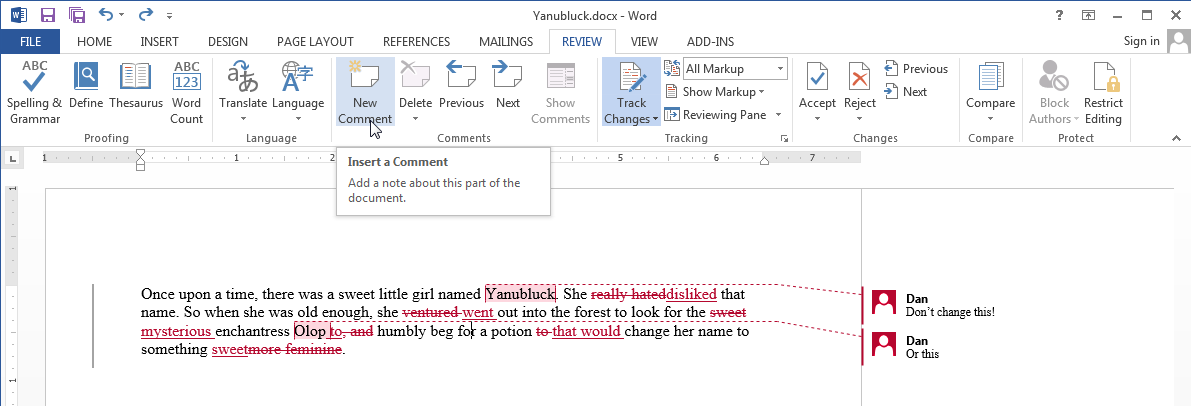
Figure 4. Comments added to the text. Editors love this feature.
You can hide the comments by choosing the Original command from the Display For Review menu, shown in Figure 5.
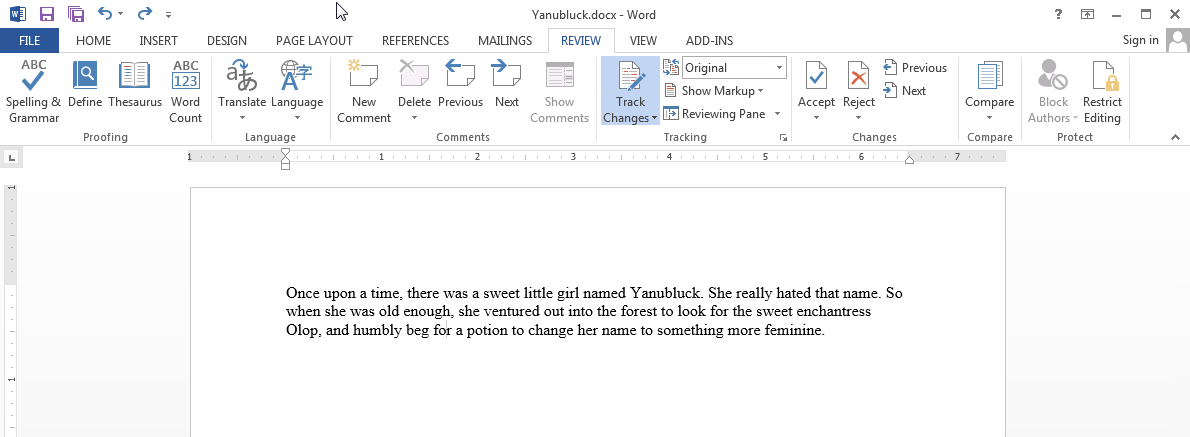
Figure 5. Comments and revisions are hidden when you choose to examine the document in its final form.
Hiding the revisions and comments doesn’t remove them from the document. To do that you need to use the Changes group on the Review tab, shown in Figure 6.
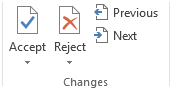
Figure 6. Stepping through revisions one at a time, approve or reject each of them.
Click the Approve button to allow the deletion or insertion. The next changed item in the document is then shown. Click the Reject button to dismiss a change and move the next item.
Comments can be pulled out as well: Use the Delete button in the Comments group. You can also use the Previous and Next buttons to skip between comments.
One final thing! Word prints out the revisions if you’re not careful. To avoid printing the revisions and comments, hide them before you print. If you leave them on the screen, then they will print. You can confirm that by looking at the preview part of the Print screen or dialog box.
