
The Gallery on your Android device is organized by albums. Working with those albums is something you can’t usually do by using the Gallery app, but it is something you can do when you follow the sneaky directions I’ve included in this post.
I’ve yet to see a version of the Gallery app (the one that comes with your Android device) that lets you create new albums and organize images between them. Perhaps Google just thinks that process is too cumbersome on a phone or tablet, but it’s a request I often see.
The Gallery traditionally organizes photos into albums based on the image’s source. So pics you snap using the device’s camera wind up in the Camera Roll album. Albums you synchronize with another device have their own names. Downloaded pictures go into a Download album. Other apps that take pictures have their own albums, and online photos end up in albums, such as those synchronized with Picasa Web.
If I wanted to add a new album, such as one just of my kids or all my goofy self portraits (which I’ve just learned as called “selfies”), I’d have to manipulate the images using a file management app, not the Gallery app. For me, that app is the ASTRO file manager.
The secret to creating your own Gallery albums is to look for a folder named Pictures. It’s found in the main or root folder. The Pictures folder contains subfolders that represent albums in the Gallery app.
Figure 1 shows the ASTRO file manager app viewing the Pictures folder on my Nexus 7. (Click the image to enlarge.)
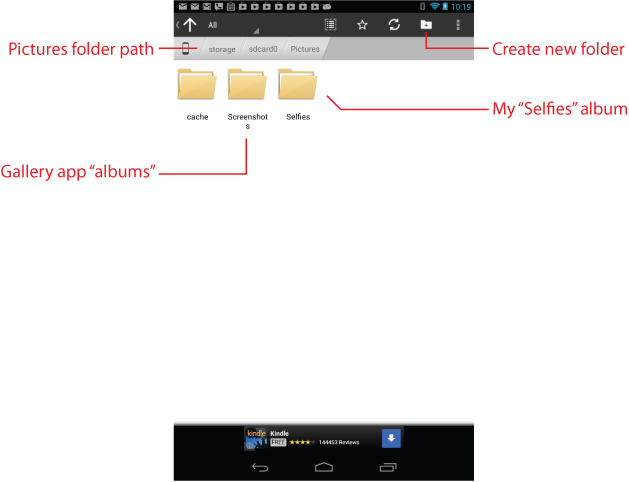
Figure 1. Creating a new folder in the ASTRO app.
To create a new album, use the New Folder button and give the folder a name. In Figure 1, I created the Selfie folder. That folder, and any images inside, now appear in the Gallery app as the Selfie album.
The next step is to copy or move the images, which must also be done with ASTRO.
Browse to the folder containing the images you want to copy or move. Long-press the image icon. After the first image is selected, touch additional image icons. In Figure 2 you can see the images I’ve selected from the /DCIM/Camera folder — the Camera Roll album.
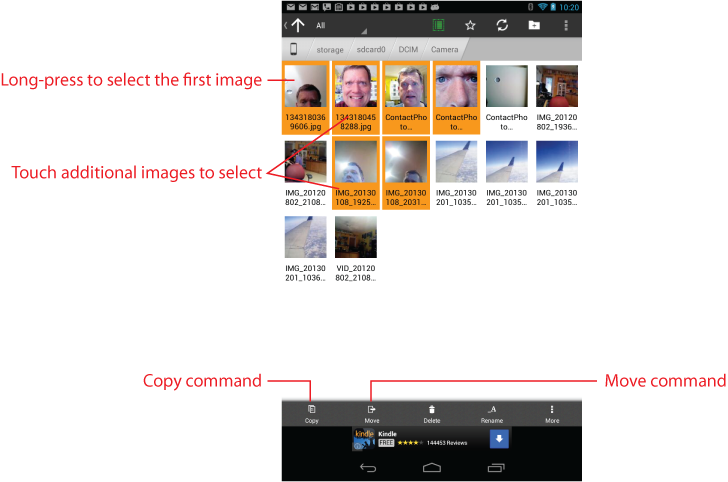
Figure 1. Selecting images to copy into the new album.
Choose the Copy command to duplicate the files, shown in Figure 2, or choose Move to cut-and-paste the pictures. Navigate back to the Pictures folder. Paste in the images by choosing the Paste command, shown in Figure 3.
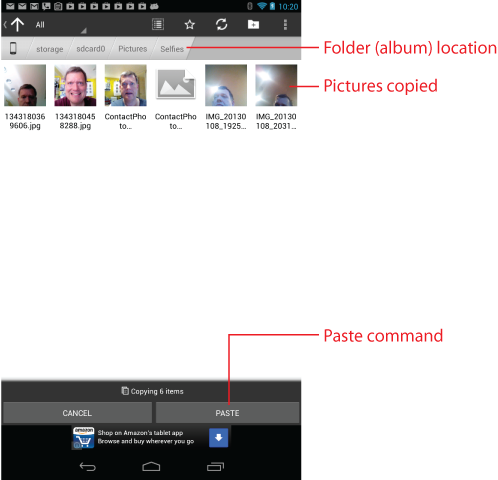
Figure 3. Images in the folder are also images in the album.
After copying and pasting the images into the new folder, return to the Gallery app. There you will find a new album, one with the same name as the folder you created. In that album, you’ll find the pictures that you’ve copied.
Working with ASTRO to manage files is okay, but a better solution might be to connect your device to a computer and use it to manage the files. Especially if you’re more comfortable using a mouse and keyboard, consider that option instead.
