I got an interesting e-mail from Michael. He was getting feedback from his laptop every time he put his hands over the keyboard. The laptop’s microphone was echoing through the speakers and creating a rather annoying situation. That led me to discover the 7 steps it takes in Windows Vista to mute a microphone.
Here you go:
1. Right click the Volume control in the Notification Area.
Up pops a volume control menu, which is a handy thing to know, especially when you may have multiple sound devices on a computer. For example, both speakers and headphones can be used by switching between them via the volume control menu.
2. Chose Recording Devices.
A microphone is a recording device.
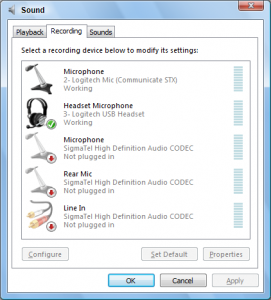
3. Select a microphone from the list.
If your PC is like mine (above), you’ll see several actual and potential recording devices, some of which may not be available. You need to find the one that’s producing the noise. How can you tell? Make noise! You’ll see the volume indicator bump a bit.
4. Click the Properties button.
The sound gizmo’s Properties dialog box appears, but you’re not done yet.
5. In the Microphone Properties dialog box, click the Levels tab.
Finally, in the Levels tab you can set the input volume for the microphone. You can try messing with the slider to set the volume just right, but the title of this post is “Muting a Mic,” so:
6. Click the Mute button.
![]() Click.
Click.
That mutes the mic.
7. Click OK, OK, and such to close the various dialog boxes and windows you’ve opened.
Now the Mic should be mute. The downer is that you have to repeat these steps to un-mute the mic. For a laptop’s built-in mic, that can suck. That’s why I recommend looking for microphones with a mute button.


