
The first macros in Word were simple keyboard recorders. You turned on the Macro command and anything you typed was dutifully recorded for playback later. Such simple macros can still be created in Word.
Begin your Macro creation journey by ensuring that the Developer tab is visible. Review this previous blog post.
The first group on the Developer tab is the Code group. Yes, creating macros these days is like programming, which the cool kids call coding.
For your practice macro, you’re going to create a command that takes a single word in a paragraph and places it on a line by itself. Effectively, the command uses the following Word keystrokes:
Ctrl+→ to move the cursor to the start of the next word.
Backspace to backup over the space.
Enter to create a new line.
Those three keystrokes split the first word from a paragraph and place it into its own paragraph. Figure 1 illustrates how the operation works by using a clever GIF animation.
Figure 1. The three keystrokes used to split a word from a paragraph.
To record these keystrokes as a macro, follow these steps:
1. Create a new Word document, one that you can use to experiment.
2. Type =rand() and press the Enter key to splash down a block of random text.
3. Ensure that the cursor is blinking before the V in Video, at the first line on the page.
4. On the Developer tab, click the Record Macro button.
The Record Macro dialog box appears, shown in Figure 2.
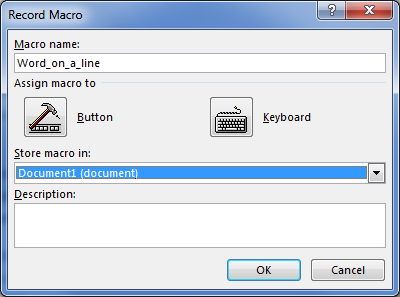
Figure 2. Name the macro here, and optionally assign it to a button on the Ribbon or to a keyboard shortcut.
5. Type Word_on_a_Line as the Macro name.
A macro name cannot contain any spaces, so I use underlines.
Normally you’d assign the macro to a button on the Ribbon or to a keyboard shortcut. For this quick demonstration, the macro runs manually.
6. From the Store Macro In menu (refer to Figure 2), choose Document1 (document).
The other choice is All Documents (Normal.dotm), which makes the macro available to all documents created with the Normal template. For this example, however, just assign the macro only to the current document. (The name might be something other than Document1 if you’ve already saved the document or it’s not the first document that you’ve made today in Word.)
7. Click the OK button to begin recording the macro.
You see the Record Macro button change to Stop Recording. Word is now paying attention to everything you type, everywhere you click — all commands given. The macro is being recorded.
8. Place the first word of the paragraph on a line by itself: Carefully press Ctrl+→ then Backspace, and finally press the Enter key.
Don’t worry if you screw up; that just means whatever keystrokes you type are recorded as part of the macro. They can be fixed later, but don’t fret over it now.
9. Click the Stop Recording button.
The recording stops and . . . nothing!
To run the Macro, you must select it from the list of Macros. Continue with Step 10:
10. Click the Macros button on the Ribbon.
You see a list of macros created in the document. Unless other macros are created, the only one in the list should be Word_on_a_Line.
11. Ensure that the Word_on_a_Line macro is selected, and click the Run button.
The macro instantly runs, splitting off the next word, provides, to a line by itself.
You can continue running the macro by following Steps 10 and 11. That procedure is a bit cumbersome, however, which is why most macros are assigned keyboard shortcuts or buttons on the toolbar. I explain how that works next Word Wednesday here on the Wamblog.
Feel free to discard the sample document.
