
Like many complex things, when Microsoft Word decides to get weird, it does so with expert precision. Fortunately, Word contains a few tricks to help you fix annoying problems.
First, some easy solutions:
Full Screen Mode. This mode has changed over the years. I’m not sure anyone really uses it, but it came about when Acrobat Reader was first introduced. What you can do is enter Full Screen Reading Mode, also known as Read Mode. That may just remove everything from the window, or it may force Word’s window to fill the screen. Word isn’t broken, it’s just entered Reading Mode which, by the way, never killed off Acrobat Reader.
Exit Read Mode to fix the problem. In Word 2007, click the Close button (it says “Close”) in the upper right corner of the screen. In Word 2010/2013 choose View/Edit Document.
Missing Ribbon. the ribbon was first introduced with Word 2007. It was permanently affixed to the top of the window. Apparently people complained, so in Word 2010 you could show or hide the Ribbon according to your whim: A small chevron appears on the right end of the ribbon, pointing up. Click that chevron to hide the Ribbon, as illustrated in Figure 1.
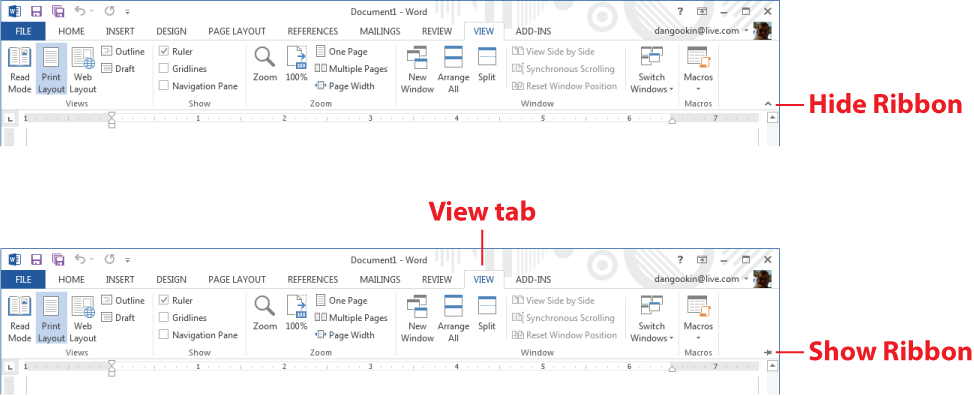
Figure 1. Showing and hiding the Ribbon. (Click to embiggen.)
More likely, you’ll be panicked should the Ribbon not appear. In that case, click any Tab heading atop of the window, such as View (Figure 1), and the click the pushpin icon on the right end of the Ribbon to stick it back in place.
Beyond those two simple fixes, both of which are cosmetic, you can take some drastic steps to troubleshoot and fix a broken Word. The two steps are similar, differing only in the degree by which they operate.
Naked Mode. Microsoft calls it “startup mode,” but it’s basically a mode where your own templates and Word modifications are suppressed. Enter this mode by following these steps:
- Quit Word if you’ve already started it.
- Press Win+R to summon the Run dialog box.
- Type
winword /a. That’swinword, which is the name of the Word program, then a space, then a slash and the letter A. Don’t type a period after the A. - Click the OK button.
In this mode, everything runs in the default setting, pretty much the way Word first ran when it was installed. Further, you cannot modify any of Word’s settings. That means that if the problem is caused by a template or macro you created, or which runs after Word starts, it will be apparent because the problem doesn’t show up in Naked Mode.
The solution is to fix the startup macro or template. For example, if you’re able to open and edit a document in Naked Mode that otherwise won’t open, then the problem is with that document’s template. Use Naked Mode to fix the template, which solves the problem.
After fixing the template, such as removing a macro or editing a style, quit Word and start it again normally.
Safe Mode. Like its counterpart for Windows, Word’s Safe Mode starts the program without any options or features. It’s designed to help you locate and fix weird things specific to Word, not in any template you may be using.
Enter Word’s Safe Mode by starting Word in the Run dialog box, as was shown in the Steps from the preceding section. Instead of typing winword /a you type the winword /safe command. The Word window shows the text “Safe Mode,” which confirms that you’re using this special operating mode.
A great way to use Save Mode is to troubleshoot Word itself. For example, suppose some dork modified the Normal template to default to black text on a black background. You can use Safe Mode to start Word, reset that font background color to something else, then save the Normal template and quit.
Please don’t create any documents when running Word in either Naked Mode or Safe Mode, so remember to quit once you’re done troubleshooting. Then you can restart Word normally.
General Office Troubleshooting. If neither Naked Mode or Save Mode does the trick, you can perform general Microsoft Office troubleshooting:
- Open the Control Panel’s Programs icon.
- Just as if you were uninstalling Office, choose Office from the list of installed programs.
- Click the Change button.
- In the Office window, choose Quick Repair, as shown in Figure 2.
- Click the Repair button.
- Obey the directions on the screen to hopefully fix Word.
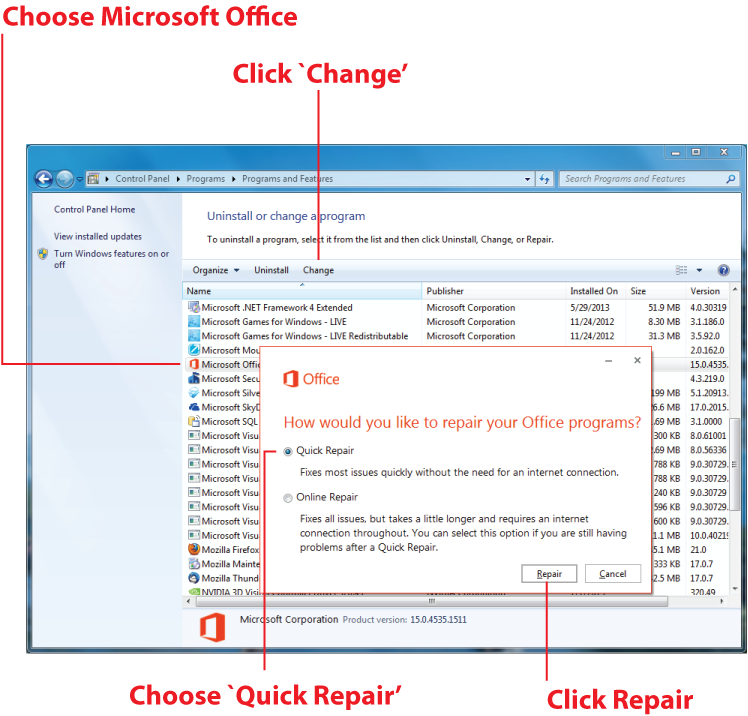
Figure 2. Repairing Word is done by using the Control Panel’s Programs item. (Click image to embiggen.)
After some gyrations, the troubleshooter stops and hopefully Word is less Weird. This repair trick has worked a few times for me, but try it only as a last resort. It’s not a magic cure-all.
