
Mail merge is one of those things you expect a word processor to do. Word takes the concept a step further, letting you create mail merge letters, email, and mailing labels, among others. Of the lot, merging labels seems to work the weirdest.
Oh, yeah: Well, all Word’s mail merge is weird. It’s just an odd thing the program does — and something Microsoft changes with every dang doodle release of Word.
A mailing label merge is more difficult because of the way the labels are duplicated. Like many things in Word, it doesn’t immediately make sense. So I’ll take the time in this post to explain it in more detail.
First, I assume that you have the Recipient List. It can be a list you create in Word, as described in my Word 2013 For Dummies book. You can also pull in a previously-created list or borrow one from Microsoft Outlook — but only when you have a Microsoft Exchange Server on your local network. Otherwise it doesn’t work well.
Second, you need to create the mail merge document. Here’s some quick steps:
- Start a new document in Word: Ctrl+N
- Click the Mailings tab.
- Choose Start Mail Merge → Labels
- Select the label paper you’re using. For example, in Figure 1, I choose my favorite, Avery 5960. You need to choose Avery in the dialog box as Microsoft assumes everyone uses their own brand label paper, which is arrogant and expected. Click OK to close the Label Options dialog box.
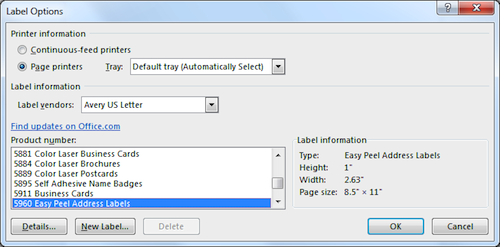
Figure 1. The Label Options dialog box.
At this point you have the label document in the window, but it’s empty. You don’t even see the teensy labels. (Well, I don’t see them on my screen.) Anyway, you need to merge the Recipient List with the sheet of labels.
And I assume you mean to print all the different labels, not just one sheet of identical labels.
Third, you mix in the Recipient List:
- Choose Select Recipients → Use an Existing List.
- Browse the universe for your list, or create a new one.
At this point, the sheet should look like Figure 2. You see a bunch of fields named <<Next Record>>. That’s the echo field; it simply repeats what’s before it. In the case of a sheet of labels, the page becomes a giant table. Each label is its own cell in the table, so the <<Next Record>> items repeat the fields (and text) you place into the first cell (label) in the table.
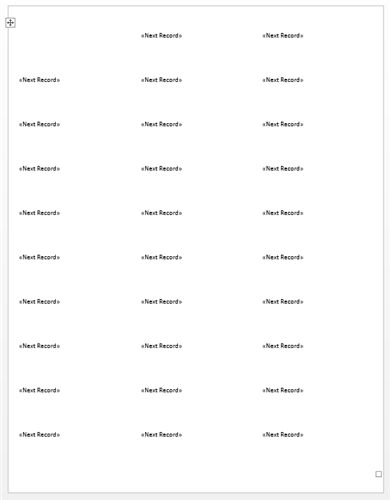
Figure 2. The sheet of labels awaits your fields.
To add the Recipient information, you need to squish the fields into the first label. Use the Insert Merge Field command to plop in each field, similar to what’s shown in Figure 3.
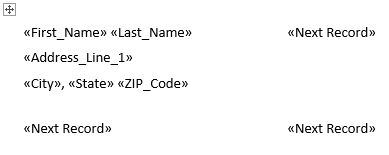
Figure 3. The fields are inserted into the fist label in the sheet.
Remember, you can add other text as well. In Figure 3, I added spaces and a comma between some of the fields and, of course, I used the Enter key to space out the address on three lines.
The rest of the labels say <<Next Record>> and that’s what you want.
Fourth — and this is the important step that everyone probably forgets — you need to click the Update Labels button. Upon success, you see the fields you added to the first label populated through the rest of the page, along with the <<Next Record>> field.

Figure 4. This is the button you forget to click.
Fifth, you preview: Click the Preview Results button. You should see a page full of labels.
Don’t bother using the Next/Previous button to examine pages; that button displays only records, so it doesn’t really work for reviewing multiple sheets of labels.
Finally, click the Finish & Merge button. Choose a destination, such as Print Documents, providing that you’ve stocked the printer with the proper type of label paper. Or you can choose Edit Individual Documents to save the results for use later.
That’s it, and it remains complicated. So don’t feel bad if you have trouble mail merging labels. The most important step is to click Update Labels. Remember that and you can survive the ordeal.
