
Anyone who’s used a copy machine can use a scanner. They both work the same way: Lay the material down on the glass. Punch a button. Soon you’ll have a digital copy. To scan things properly, however, takes a modicum of finesse.
The basic scanning operation works like this:
1. Place the material in the scanner.
2. Run the scanning software to copy the image.
3. Save the image as a file in the computer.
That’s how most people use a scanner, and it’s how you end up with the kind of image shown in Figure 1. That’s probably not what you want. Worse, some people aren’t even aware of the problem.
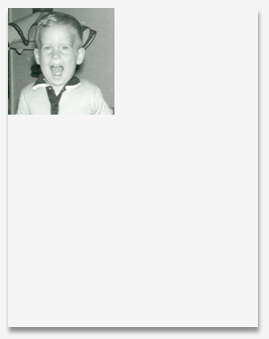
Figure 1. An image is scanned, but not cropped.
The problem? It’s not that the image was scanned too small, but rather that the important part of the scan wasn’t selected. Instead the entire scanner bed surface was saved, which includes a lot of useless white space.
This mistake is often caused by the scanner itself: The “Scan” button lulls you into believing that it’s magic. It’s not. To scan properly you need to avoid the simple approach and use the software that came with the scanner. The key is to select and crop the part of the image you want to keep.
Figure 2 illustrates an old scanner program’s input screen. After a pre-scan, you choose the select tool to lasso a portion of the image. In the figure, only the photograph is selected. The software uses only that portion of the image to create the final result, which happens after clicking the Color Photo button.
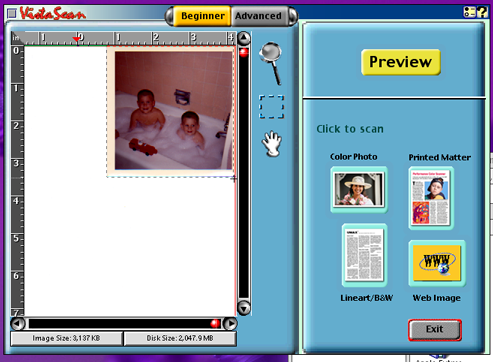
Figure 2. Cropping in an older scanner program.
The scanner program I use now is pretty complex. In Figure 3, you see the first scanning steps as the program presents them:
1. Put the document in the scanner, but also choose whether you’re scanning an image or a transparency.
2. Choose the type of document, color, grayscale, magazine, and so on.
3. Scan, which is actually a pre-scan.
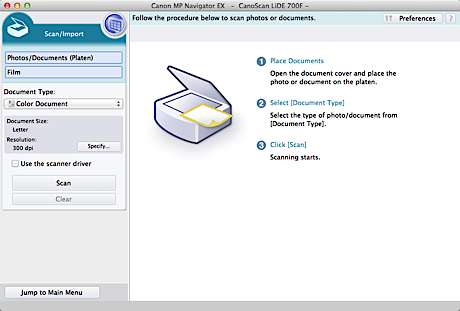
Figure 3. The scanning program’s main interface.
After clicking the Scan button, the pre-scan window appears, shown in the background in Figure 4. That’s where the portion of the image you want to keep is selected.
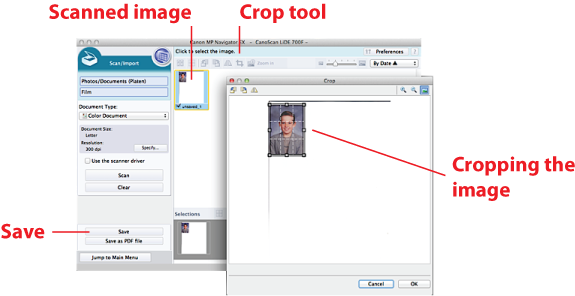
Figure 4. Steps for cropping and saving the scanned image.
To finish the operation (Figure 4), choose the image, then click the Crop tool to view the image in the Crop window. Select the relevant portion of the image (shown in Figure 4) and click the OK button to make the crop. When the image is saved, the only the selected part remains.
No matter what scanner software you use, the bottom line is to select and crop the portion of the image you want to keep. That makes the final results what you intended. And when the final results don’t match what you need, you can always crop an image by using a photo editor. I’ll show you how that works next week.
